Overview
Before using this document, read the general Mixpanel SSO set-up instructions.Configure SSO in Mixpanel
Follow the general SSO set-up instructions. Make sure to collect your postback URL and successfully claim your domain.Configure the Mixpanel App in JumpCloud
Go to JumpCloud and create a custom application with the following values: SP Entity ID: https://mixpanel.com/security/sso/v2/authorize/ ACS URL: https://sso.mixpanel.com/sso/saml2 Login URL: <Mixpanel’s Postback URL from your org settings> IDP Entity ID: The value itself doesn’t matter much but it must be unique across all Mixpanel customers and must also be a URL, so something likehttps://sso.jumpcloud.com/saml2/<your-company-name>-mixpanel would work swapping in your company name. You will paste this into Mixpanel’s Issuer URL field.
IDP URL: You will paste this into Mixpanel’s Identity Provider Sign-in URL field
You will also want to download the IDP certificate to upload into Mixpanel
Make sure to pass through the attributes: email, firstName and lastName.
Only email is required but the other two are useful if you want to provision new users with SSO via IDP Managed Access.
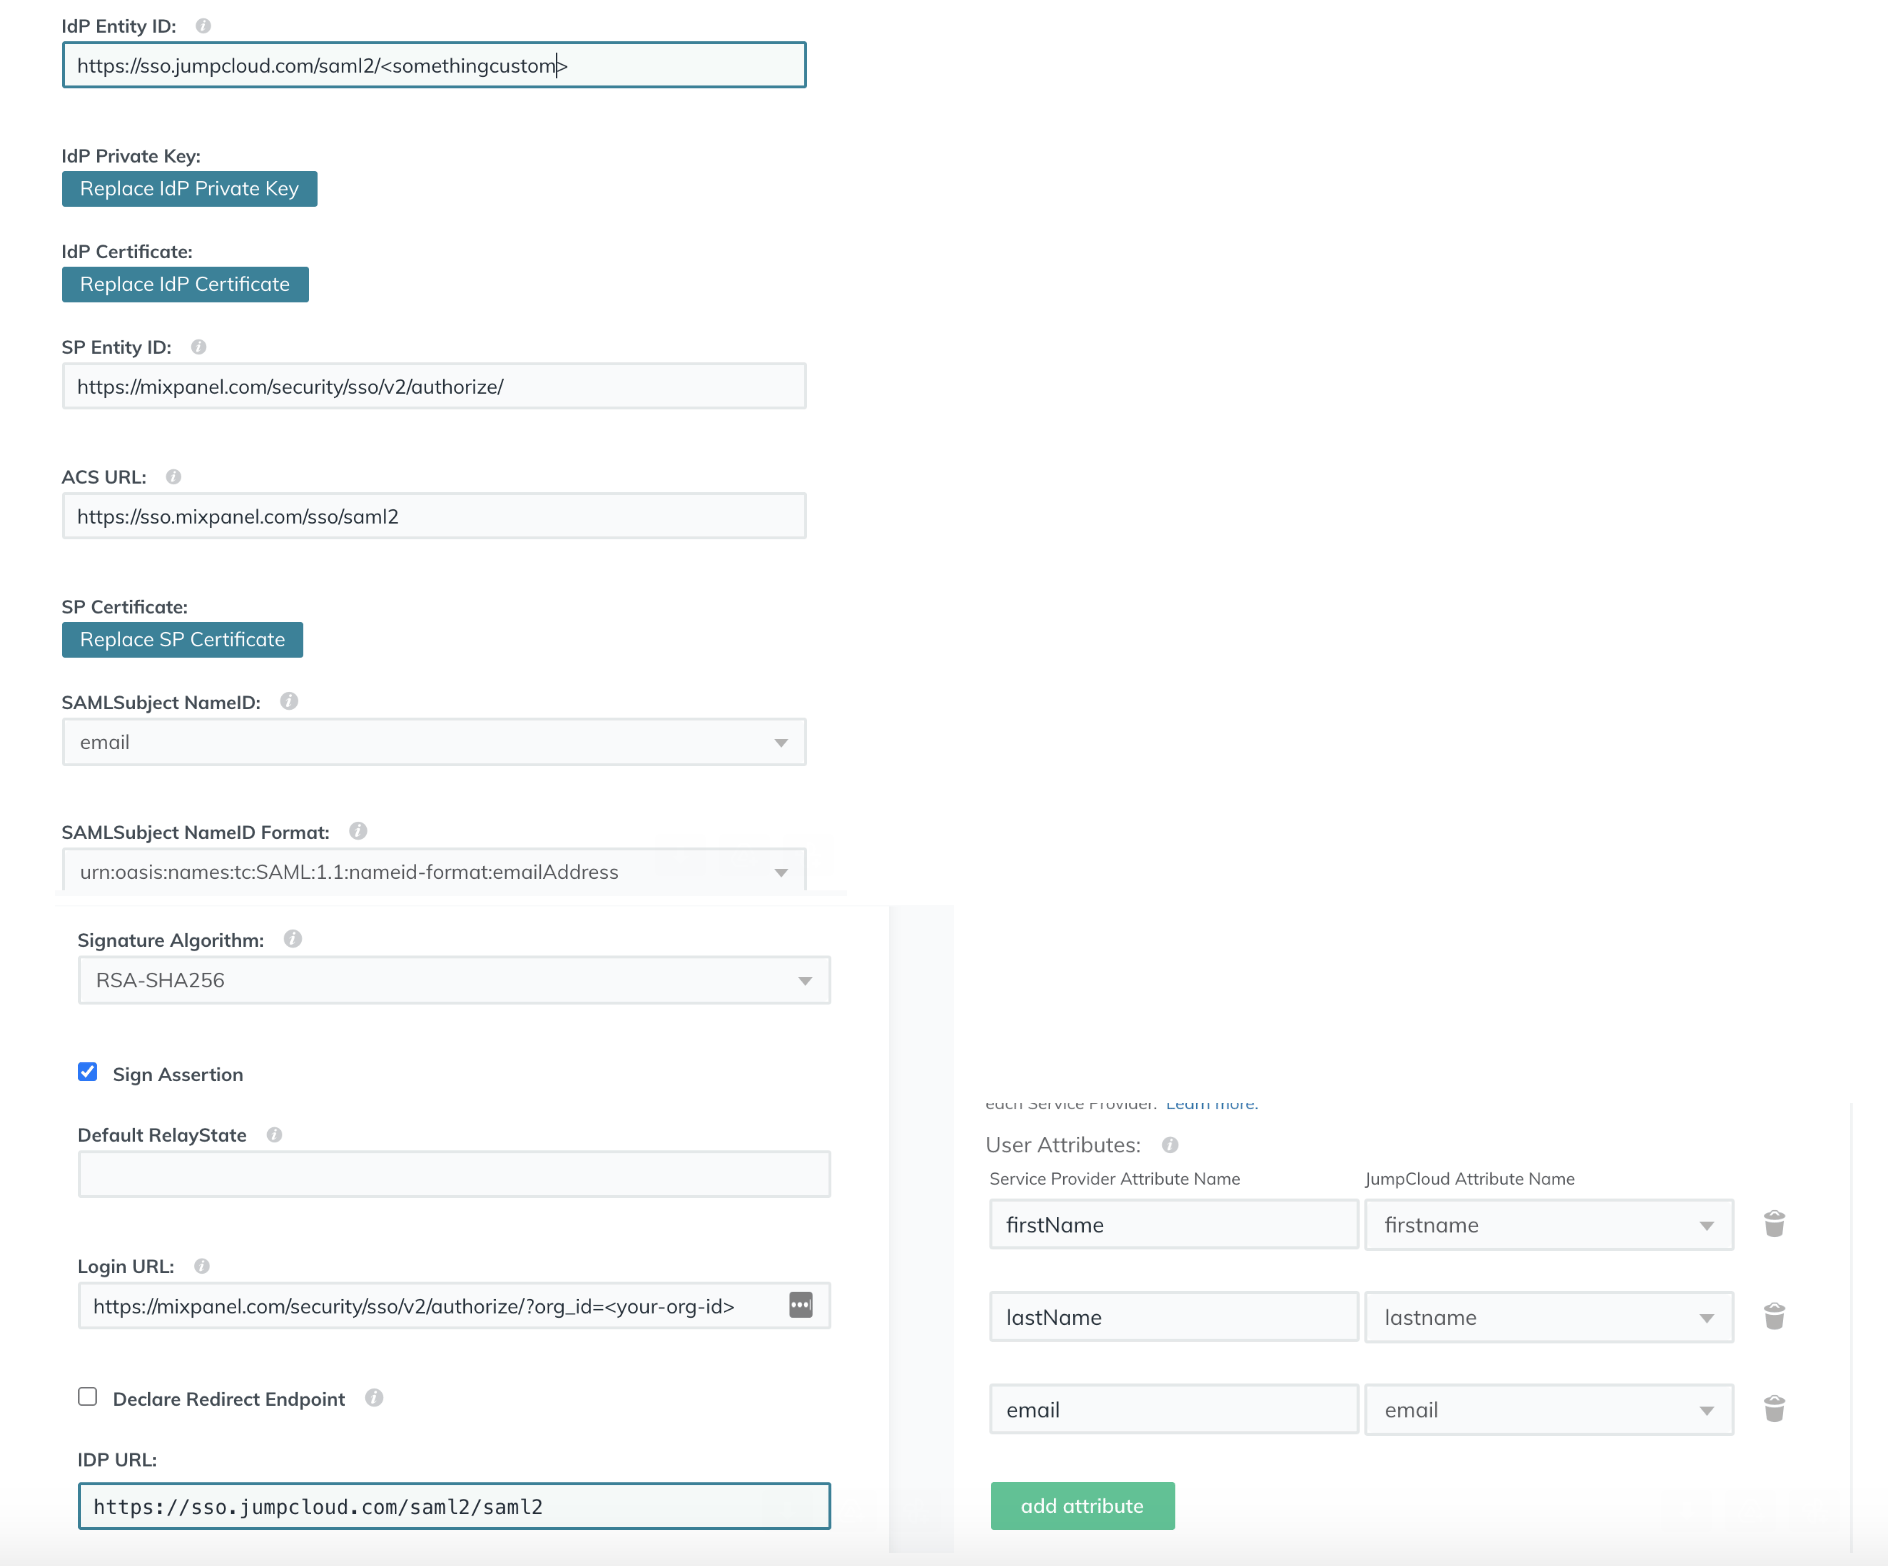
Here is a screenshot of an example setup: